Sunday, December 7, 2014

Out with the Old ...

One of the first projects I completed after I built my original vegetable garden was the construction of a compost bin. Compost bins are so important for a gardener. It doesn't matter if you have a small garden, large garden or container garden. What comes from a compost bin is a critical element to add back into your garden. I am constantly filling my bin up with coffee grounds, egg shells, old plant material, leaves, grass clippings and vegetable scraps from the kitchen.

I built my first compost bin about 15 years ago. The design of this compost bin was based on plans contained in the book "Crockett's Victory Garden". As you can see from the first picture, the idea was to create three separate sections. As the material broke down it was moved to the right so that the last section contain compost ready for the garden. It has served me well but as you can see it was time for a new one.


The internet is a wonderful thing and I was able to find some really good designs and ideas for my new compost bin. After my research, I decided my new compost bin would be built again based on the same concept of my old one by providing three sections for the various stages of the composting process. However, I decided to make several upgrades and modifications based on my 15 years of composting experience. To begin with I made the new compost bin sections wider and deeper. This allows me to add much more initial material and get more finished compost at the end. I also, raised the bottom of the compost bin off the ground about a foot. I did this to make moving material from one section to the next easier on my back. Also, by having the compost above the ground I am preventing roots from growing in my compost. It was amazing how the last section of my compost bin attracted roots. In a way it was good because it told me the final compost was full of nutrients and easy for plants to grow in. Finally, I changed the size of the screen that divided the sections. The old compost bin  had one type of screen for the whole unit. The space between the wire was very wide and compost was constantly falling out. Not sure how much compost I wasted by having it fall out the back and sides but I was constantly cleaning up around the outside of the bin. This time around I went with a wire mesh and made sure I had small holes on the last section so the compost stays in the bin and not out the back. The bin was made from a combination of scrap wood and new wood. I avoided green treated wood so that the compost didn't absorb any of the preservatives.

I got this done late summer which was just in time for all the leaves from my yard and the old garden plant material.  All of this helped to complete the composting circle. I think it turned out well

Here are some pictures.


Sunday, November 30, 2014

September Wind Down

I started this post in September but got completely distracted from writing my blog. Not sure why it happened but it did. In reading this post it reminds us of how fast the weather changes and how quick the growing season really is in Wisconsin.

Remember, I wrote this in September ...

The summer has really gone by fast and we over the past couple of weeks we have entered a new phase for gardening. The days MAY warm up but the nights are cool which makes it hard to grow anything.

My Brussels Sprouts are doing well and forming little heads on them. The great thing about this vegetable is that you can grow it so long into the fall. The cold nights and a little bit of frost make them even better.

Brussels Sprouts and Carrots


I don't have enough carrots to harvest and store into the winter so I have been slowly harvesting my carrots as I need them. My goal is to keep then covered when the weather turns really cold so the ground around them doesn't start freezing. Last year I was able to have carrots at Thanksgiving with this approach.

Carrots ready for cleaning and eating

The potatoes grown in the Smart Bags have been a huge success. We just walk out the back door and dig in the bags with our hands to harvest a few potatoes. The chipmunks also really like this so I have been covering the tops of the bags with anything that will keep the soil moist but stop the chipmunks from digging in there.

My green peppers have stopped growing but I have a couple still on the plants. I have left them on there and have been harvesting as needed.

The lettuce that I planted a month ago has been harvested over the last week. It is so great to have a fresh salad from the garden. I'm hoping that the weather will cooperate and allow the lettuce to regrow so I get another cutting. This week I will be setting up my cold frame in the garden. I will prepare the soil with a good load of compost and then plant lettuce and spinach. I have no intention of harvesting this crop this year but will let it grow into winter and then regrow again in the spring. This worked perfectly last winter so I'm hoping this works again. The heavy snow load over the cold frame was a great insulator from the cold air. I'm not sure what would have happened if we just had cold temperatures with no snow.

Look close for the lettuce that will grow over the winter

Remember, even though your garden or containers might be done for the year you can still get fresh veggies by visiting anyone of the local farmer's markets. This is such a great way to continue to eat fresh veggies and support your local farmers.

Monday, September 8, 2014

Tomato Ripening

As the summer draws to a close and we start losing those hot days needed to ripen vegetables, we need to start thinking about how to maximize the harvest from all of your tomato plants. Ripening in a tomato is the process in which it's green chlorophyll begins to break down and other pigments in the tomato begin to surface. This change, along with increasing softness and sugar content are what leads to really good tomatoes.

Ready to eat!
In general, the best time to harvest your tomato is when they are turning from orange to red. At this point I set my tomatoes on the counter to receive indirect sunlight and finish the ripening process. Real professionals don't recommend counter ripening. Lots of the ideas center around covering the tomatoes with newspaper or putting them in a brown paper bag so sunlight doesn't hit them and having temperatures in the 65 to 70 degree range. Seems like a lot to go through when the tomatoes ripen just fine on the counter and look really nice.

Need a little more ripening
The weather report for later this week and into next week is for night time temperatures in the low 50's and daytime temperatures in the 60's.  Great conditions for my Brussels sprouts but terrible conditions for getting those green tomatoes to ripen. Here are some ideas on what to do as colder weather starts taking over.

First, make sure you cover your plants with fabric or plastic to keep the frost off the vines. Using an old sheet is a great way to protect the plants.  The good thing about this is that early cold snaps are often followed by some nice weather that can ripen tomatoes.

Second is a method called root pruning.  I have never tried this but have read about it a couple of times. The idea is to insert your spade six inches into the ground in a circular pattern around the tomato plant. The circle should be about one foot away from the main stem. This technique forces all the remaining plant energy into ripening the tomatoes.

Finally, don't worry about it and harvest the green tomatoes. There are a ton of recipes for green tomatoes on the internet.


Wednesday, September 3, 2014

Garden Update and Onion Drying Rack

For as cool and rough as this summer has been, the garden has really been producing some great vegetables.  The cucumbers grew well this year. We seemed to have the right amount of rain when they needed it to ripen just perfectly. The cucumbers were sweet with very mild skins on them. The green beans have grown nicely and provided several chances to harvest multiple bowls full. Green peppers have been alright but nothing too crazy. They are a plant that really likes the hot weather, which we just haven't had much of. My potatoes, in the growing bags, are just about ready to harvest. I think by the end of the week they will be ready. I will definitely share pictures.

Nice harvest

Just one of the green bean harvests
 
The bees really liked the sunflowers

I wrote about my onions a week or so ago and the proper way to harvest them. After I wrote that I decided to change up my onion harvesting strategy a bit this year. I decided not to dry any of the red onions, but to just use them as needed right from the garden. This has turned out to be a great decision. There is nothing better then walking out to the garden and pulling a big, fresh red onion to slice and put on top of a burger you just finished grilling.

It has been so damp and humid that my yellow onions have had a hard time drying, both in the garden and in a sheltered area in my backyard. To be honest, my sheltered area is underneath our old play set. The area underneath the fort in the play set makes a perfect area out of the rain and sun. However, I needed to come up with a solution to get the onions off the wood base of the play set and allow air to move around them. I did a little research and came up with an idea to make a three foot square dry rack out of screen and scrap wood. I think this turned out really well and my onions are drying beautifully. Thanks to my son Charlie for helping out.

Yellow onions drying the old way

New drying rack

Drying rack with yellow onions on it


eatwell101.com/best-tomato-pie-recipe

Wednesday, August 20, 2014

Harvesting Onions

When ordering my seeds this past January I had a hard time deciding on what kind of onion plants to order for this year. So, like any good gardener, I decided to order more than I needed and plant three kinds of onions. To do this I ordered the Northern Bunch onion plant mix from Territorial Seed Company. The specific varieties in this bunch were Walla Walla (a yellow onion), Red Zeplin (a red onion), and Ringmaster (a white onion).

As promised in the seed catalog, the onion plants arrived at just about the right time for planting here in Wisconsin. The onion plants came in a small box containing 50 to 75 plants. I divided the plants into three groups - red, white, and yellow. I then prepared about a 20 foot long mounded row for planting. Each variety got about 6 to 7 feet of the row.

Onions shortly after planting
Now after many weeks, the onions are just about ready to be harvested. There are two ways to use the onions. The first way is to just simply go into the garden and pull an onion out for whatever you need in the kitchen. I have done that with my red onions this year and they are just about gone. They have been really good this year.

The second way to harvest the onions is to dry and store the onions. This is more work and you really need a proper place to dry and store them if you want success. I plan to do this with my white and yellow onions.

You will know when your onions are beginning to mature when the green stalk starts turning yellow or brown and falls over to lay on the ground. It is a good idea to speed up this process by bending the stalks over at the onions so they are laying on the ground. After a few days in this condition, use your spading fork and loosen the soil around the onion. The onions can then be pulled up and laid on top of the ground to begin the drying process.  Do this very gently since onions bruise easily.  Once they are bruised they become very susceptible to rot. To prevent sunscald, lay the onions out on the dirt such that the stalks of one onion cover the bulb of another onion. 

If you look closely at the onion stalk you will notice that it is made up of several smaller stalks. Each small single stalk is called a leaf. You will know if you have grown a mature onion if there are 13 leaves on the stalk at this time. 

Variety of white onion called Ringmaster

Variety of yellow onion, Walla Walla, beginning to fall over

When the tops are completely brown, the onions should be gathered up and laid out in a dry spot out of the sun. It is a good idea to lay the onions out on an elevated screen or mesh to allow air to circulate around them. The onions are ready for storage when the stalk is dried all the way down to the onion. If you pinch the stalk at the base it won't slide or feel soft. Also, the skin of the onion should take on a uniform texture and color.  Before storing, clip the roots and stalks off to within one inch of the bulb. The onions should be stored in a cool, dry and well ventilated space in a mesh bag.

I've read that sweeter onions tend to rot quckly so eat those up first. Finally, remember these words from the Farmers Almanac ....

Onion's skin very thin,
Mild winter coming in:
Onion's skin thick and rough,
Coming winter cold and rough.


Sunday, August 10, 2014

Veggies in a Flower Garden

I was in Chicago a couple weeks ago for a work conference.  At the end of the day I took a walk down to Millennium Park.  Check out the pictures of these flower beds.  Love the idea of growing corn, Swiss Chard and other vegetables in your flower garden. This makes for a really interesting flower garden from a color, variety, height and texture perspective. Would love to see Milwaukee do something like this in their public gardens. I am going to try growing corn in my flower garden next year for sure.


Sunday, August 3, 2014

Cracked Tomatoes


I thought it would be good to talk about a condition with your tomato plants you might have this year. The condition is called tomato cracking or split tomato. Here is a picture of what the condition looks like.

The split tomato is really caused by a lack of water. What happens is that in a dry spell or if you don't water consistently, the tomato can dry out and crack. The tomato needs water to stay juicy and lush. When you water again or it rains, the tomato takes in the water and splits at the spot where it had previously cracked. Kind of like overfilling a water balloon.

In addition to an aesthetic issue, the crack in the tomato can allow bacteria and fungus to enter the plant so it is important to water your tomatoes properly.

Tomatoes should receive one to two inches of water per week. This water should be provided on a regular and even basis. Don't forget to use mulch to help keep the soil moist and disease in check. Finally, if you go on vacation ask your neighbor to help water. Most people will gladly water for you in exchange for some tomatoes.

Sunday, July 27, 2014

Tomatoes and End of July Garden Update

It is interesting to look at your garden and where it is compared to other people's gardens.  For example, my cucumbers are only about an inch long at this point. When I looked at Facebook the other day, I saw one of my gardening friends had already made pickles from cucumbers she harvested in her garden. Clearly, the cold weather by the lake has done no favors to warm weather loving plants like cucumbers.

How are your tomatoes doing?  Do they have any funny looking leaves on them? Have they set tomatoes yet? I have several plants with tiny tomatoes on them so I am a ways off from harvesting any tomatoes. However, the other day I noticed some yellow and brown leaves on the lower part of some of my tomato plants.  Here is what they looked like.


Anytime you see something like this you know something is wrong and action needs to be taken right away.  Problems can develop overnight with your plants and then get out of hand very fast. At this point, you have worked too hard to have something decimate your plants now. While these are not good signs for a tomato plant, if acted upon quickly it is nothing to get too alarmed about. My action, of course, was in the form of an internet search. I Googled images of tomato diseases. You get some pretty crazy looking stuff but after looking at several websites I determined that my plants had some kind of fungus. To me it looks like a fungus called Septoria or Early Blight. These are very common issues especially with the wet spring and summer we have had up until recently. I immediately went back to the garden and clipped all the stems off with any issues on them. I then put these infected stems in the GARBAGE.  I did NOT put these into the compost pile. Putting them in the compost pile means that the fungus will keep living and will reappear when I apply that compost at a later time.  Next, I added some mulch to the area underneath my tomatoes.  This will help keep moisture off the plant leaves. The most important thing to do is to bottom water your tomatoes so the water from your sprinkler does NOT touch the leaves. All these actions will help create a drier environment that is not conducive to fungus. Pretty sure I will move my tomato plants to a different part of the garden next year as well, just to make sure.

My yellow squash are coming in nicely and I actually got to harvest ONE of them last week.  The carrots are really doing well.  So well in fact, that if I wanted to I could harvest some.  Probably should do that since they are so sweet early on like this. In the past I have tried to stagger the harvest of my carrots. If you watch for rot in your carrots and keep them watered, the ground acts as a natural storage container. I have done this so late into the fall that I have had to cover them up with a blanket to protect them from frost. It is awesome to be able to go grab a couple carrots in October. I finally pulled my lettuce out.  I had gotten at least four cuttings from this planting so it was time to get the space ready for fall lettuce.  I will keep the area tilled, fertilize it once, and then finally layer it with some compost from my compost bin. After it rests for a bit like this it will be ready for a mid to late August lettuce seed planting. As you can see in the pictures the beans are really growing and have plenty of flowers on them. The onions are still growing with no signs of being ready to harvest.

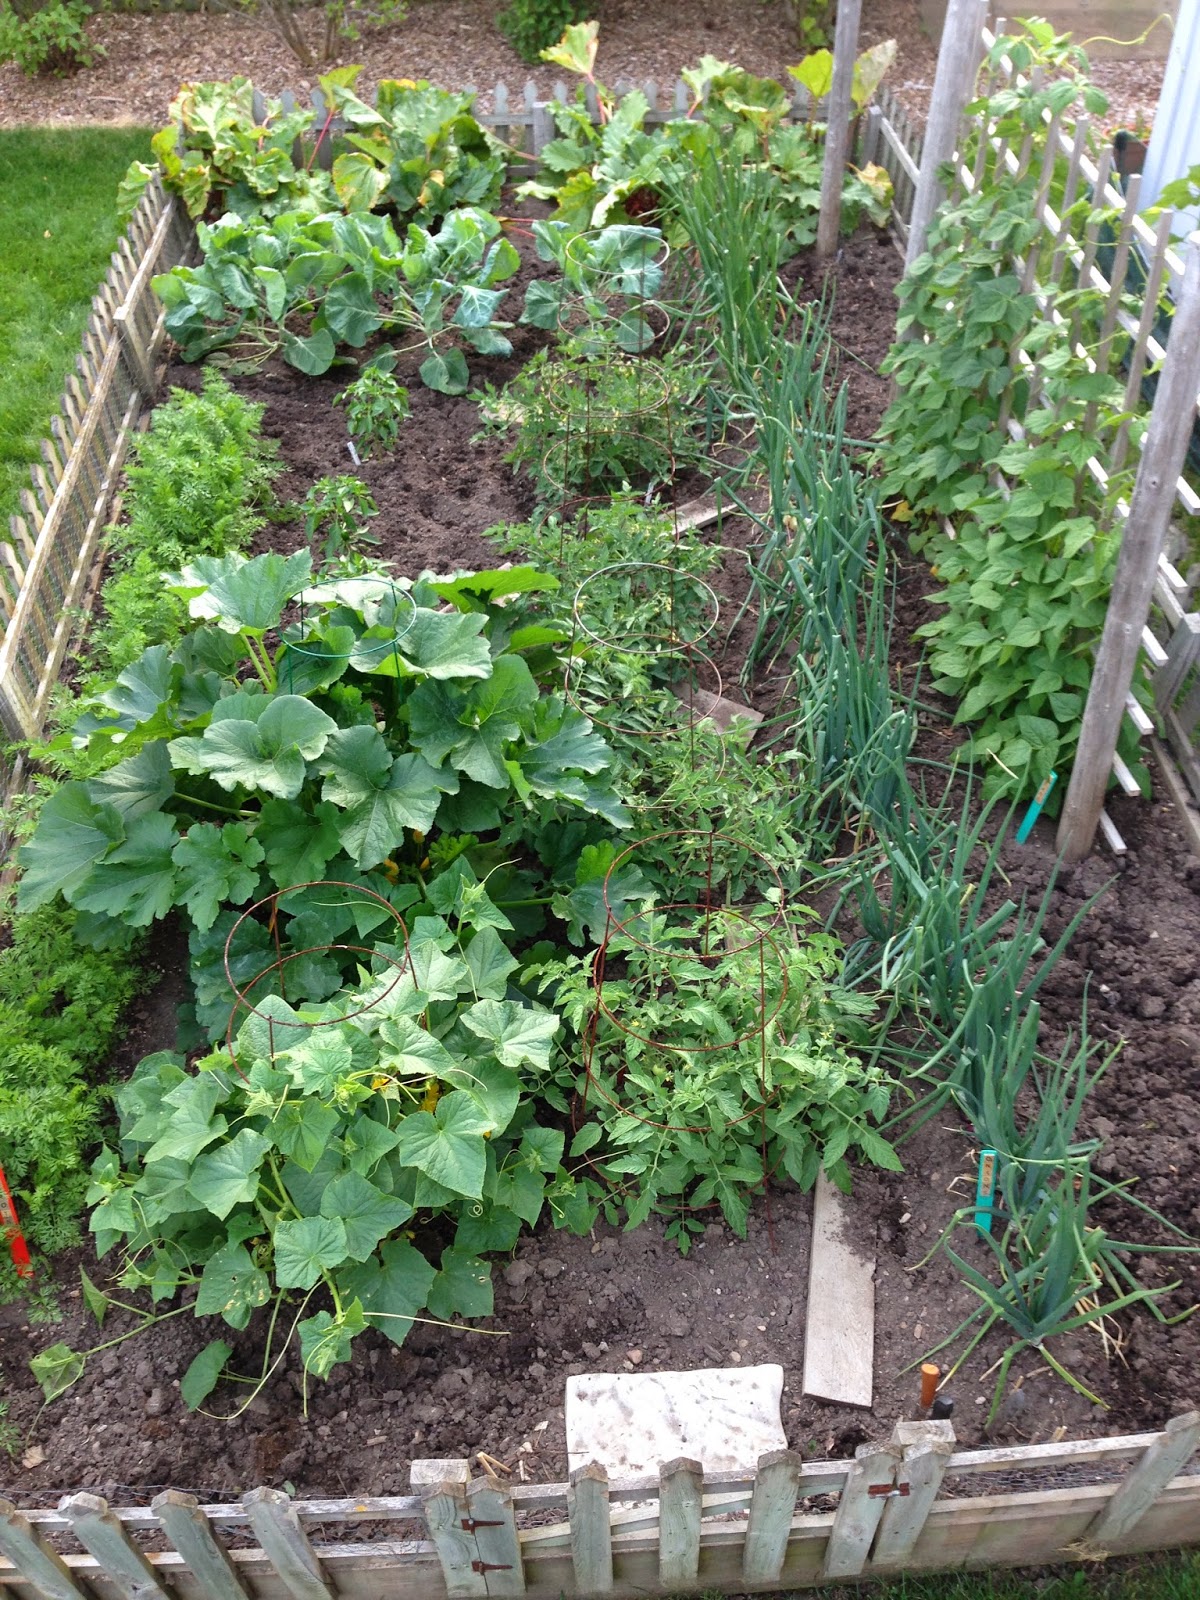
Here are some pictures of my garden at the end of last week.


Sunday, July 20, 2014

Random Garden Stuff

Now this is a rain gauge. I saw this at Cedarburg's flea market last weekend and thought it would be a great addition to my garden. The vendor didn't have a price on it so I asked her about it. She said she was thinking $18. I said thanks and left because I really didn't think I could get her anywhere under $10, which I thought would be fair. The great thing is that I had the flea market pro haggler with me - my wife Lisa. So after a bit, I sent her over there to cut the deal as I hid a couple rows away.  Sure enough, Lisa got it for $8.  The funny thing is that when Lisa asked her what she wanted for the rain gauge the vendor tells her $10 and Lisa talks her down to $8. Really? $18 to $8 in a matter of a half hour. Anyway, check out the detail on this rain gauge. The information about the co-op is really neat and it is made out of metal. What is up with that phone number?


This picture is proof you can have a garden just about anywhere you want. I saw this when I was kayaking this weekend.  This person had potatoes, tomatoes and peppers in his pots. Seems like a good way to keep deer out of your garden.


Sunday, July 13, 2014

Summer Is Kicking In

Alright, now we are getting somewhere. The weather has finally started to cooperate for summer vegetables. The tomatoes are growing very nicely and with small tomatoes on some plants. I see a few yellow squash starting and the carrots are just really taking off. Weeds love this weather as well, so you really need to stay after them. They can get out of hand really quickly.

Notice the gap in the first two posts.  My peas were supposed to be there.


The onions are growing very well too. They look like spiky grass right now but pretty soon they will begin to flop over and harvest time will begin.


Its funny because as bad as this weather has been for some heat loving vegetables, it has been excellent for other vegetables.  I really can't remember a better season for growing lettuce.  I am on my third cutting of lettuce. Usually by this time of year the hot and humid weather has taken its toll on most lettuce varieties and they just don't grow well.  Here is a picture of my lettuce before I get ready to harvest it tomorrow morning. It is always best to harvest your lettuce before the sun starts hitting it.  Did you know that lettuce is a member of the sunflower family?

Lettuce ready for harvest
Gardeners are always thinking ahead.  They can't help but think about what they will change for next year and what needs to be planted soon. I sometimes think gardeners are never happy with the way their flower and vegetable beds look. They always think there is another kind of flower or vegetable to add or a plant that needs to be moved to a better location. Right now I am starting to think about what kind of vegetables I need to plant now for fall harvest. The one item I really want to get in within the next week or so are my peas. If you remember I was robbed of peas this summer when my local rabbit got into my garden and ate all my peas. The first average frost date in Milwaukee is about October 20th.  I think it might be a bit later than that along the lake but you never know.  With that October date in mind, I need to get my peas in the ground within the next week or two.  Hopefully, the local rabbit has moved on.

I think I may have beaten the cut worms for this season.  I suppose I might need to worry about the deer at this point.  Oh well, here is a picture of my sunflowers.


Here are a couple pictures of my perennial flower bed.  My clematis that I planted last year are loaded with flowers but I need to add some more plants. See? Always something to do.


Friday, July 4, 2014

Garden Update

All that hard work this spring and early summer in the garden is suppose to be paying off now. Not this year. It is just flat out frustrating and everything is just so slow to grow. Rain, clouds, fog and cool weather by the lake have not been good. We so need a couple weeks of sunny and 80 degree weather.

I look at my garden every morning before work and then again every night after work. Nothing seems to be growing. I'm probably looking at it too much so nothing is changing in my mind. I clearly just need to leave it alone for awhile but I keep thinking of fresh tomatoes and carrots.

Now, having said all that, my potatoes are growing like crazy.  These are the potatoes I am growing in the Smart Pots. I have previously written about these back in my May 18th post. These bags have really worked well.  They don't seem to dry out fast and they have been very durable.

Potatoes taking over!

Yes, blossoms!

While I'm waiting for my vegetable garden to grow I have several other projects to do in the yard. There are several bushes that need trimming, Lilac blossoms to cut off, perennial flowers are taking off and need trimming and there are always weeds to pull. Just when you think you can relax as a gardener there is something to do.

Gardening requires such calmness, patience and understanding.

Here are some pictures of my garden from last week.

Long row of carrots

Onions are cranking and beans on the right are climbing!


Still having trouble with cut worms